Recipes


We are in the FINAL week for Quantum CrossFit’s GET REAL Food Challenge!!  In this week’s round-up you’ll find some serious comfort food and a few “eggs-pert” cooking tips.  Here we go (in no particular order):

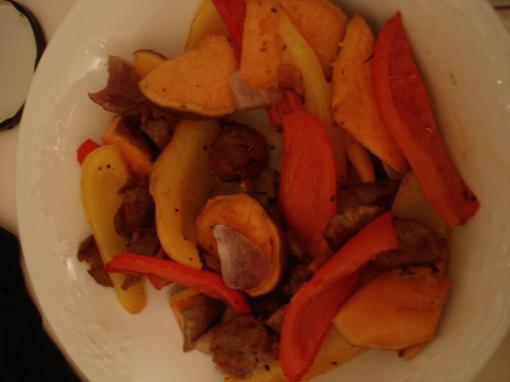
Christine’s Peperonata

Version of Peperonata..kind of.

Ingredients:
– 1 red pepper chopped coarsely
– 1 yellow pepper chopped coarsely
– 1/4 of a large red onion chopped coarsely
– 2 already cooked Spicy Italian sausages
– 1/2 sweet potato chopped into small chunks

Directions: Throw together with some olive oil and black pepper and bake in oven at 350 for an hour.

For me this will make 2 servings I will serve with a side salad.

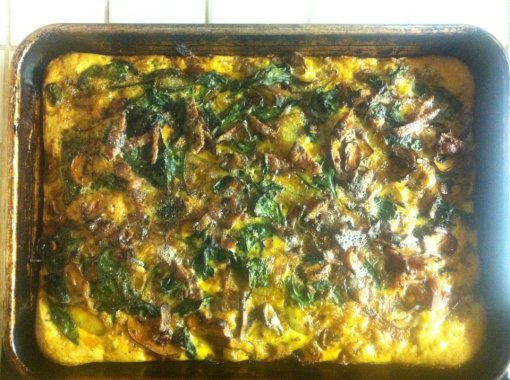
Michelle’s Green eggs and Turkey

I used a the recipe for “Green Eggs and Turkey” from Paleo Comfort Foods as a guide and made an awesome frittata.

Ingredients:
– Ground chicken
– 
Onions
– 
Mushrooms
– 
Spinach
– Bacon-5 strips
– 1 tbsp of dried basil
– Clove of garlic
– 12 eggs

Directions: Cook bacon, set aside. Use same fry pan and brown chicken. Keep as much bacon fat in there as you desire. Lay chicken out in a greased pan. (My pan is about 8×10). Caramelize onions and mushrooms, add garlic. I put a glug of balsamic in there. Add basil. Put three good handfuls of raw baby spinach in the pan, cook until a bit wilted. Pour that on the chicken, chop up the bacon and sprinkle on top. Whisk the eggs and pour it over everything. Bake for 45 min @ 350 degrees.

Eat it.

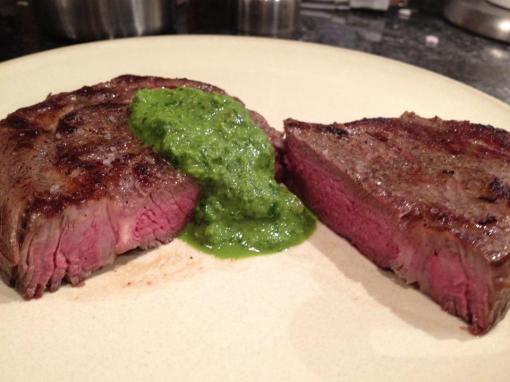
James Rib-Eye with Chimichurri

I did the rib-eye sous-vide to get perfect edge-edge medium rare (I normally like rare, but my wife likes something a bit more done) and quickly seared it afterwards with a really hot cast iron pan.

My take on Chimichurri sauce. This is an amazing Argentinian style sauce that goes great on all meats.

Ingredients:
– 4 Large garlic cloves
– 1 bunch of flat leaf parsley
– 1/3 cup of red wine vinegar
– 1/3 cup of olive oil (extra virgin)
– Juice from one lemon
– 1/4 cup of diced red onion
– 1 tsp black pepper
– 1 tsp salt
– 1 tsp aleppo pepper or chilli pepper flakes.

Directions: Mix together and smother.

I like my chimichurri really tart so sometimes I’ll add more vinegar or lemon juice.

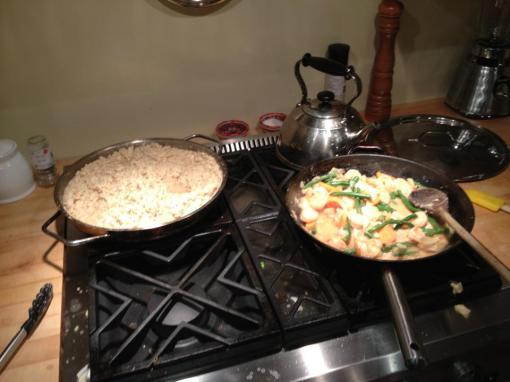
Jack’s “Time to Get HUGE” Shrimp and Grits

Summer: Jack competed in his first weightlifting competition this past weekend, Winter Lift, and did really well.  I’m thinking this masterpiece has something to do with it. Congrats Jack!!

What started as a hunger pang during studying led to an hour of improv in the kitchen, as I chopped, sauteed and fried my way to my very own version of Southern Shrimp grits (from Paleo Comfort Foods). 

Oh, I also tripled the ingredients for the rice. I’m loving the batch cooking.

Grits
– 

2 heads cauliflower (riced in food processor), yielded ~12 cups
– 
~2L Beef broth
– 
3 Cups Almond meal

Toppings
– 

3 lb shrimp (i only had one, but now I’m only going to have enough meat for 1-2 servings of this)
– 1 Crown Broccoli
– ~3 large diced sweet onions
– 
1 Large sliced carrot
– 400g green beans (a few fistfuls)
– 
1 cup beef broth
– A splash of whiskey or sherry
– 2 tbsp Coconut flour
– 12 strips of bacon
– 6 Cloves of garlic
– 
1/2 lemon, juiced

Grits – Cooking


1. Rice the Cauli in a food processor
2. Put all ingredients in a big saucepan (might want to use a pot if you don’t have a big one), mix on medium heat
3. Cover & Simmer for about 20-25 minutes until the liquid is absorbed. If it doesn’t absorb, drain some of it through your finest colander

Toppings – Cooking
1. Cook all the bacon until crispy, dice it when it’s done
2. Sautee Onions, carrots and green beans in some butter (timing is important here, beans in first for a few minutes, then carrots, then onions)
3. Coat shrimp with flour in a bowl, set aside.
4. Add shrimp to veggie pan with minced garlic, cook until shrimp are pink
5. Pour in Beef Broth, whiskey (or sherry) and lemon juice
6. Simmer for 5 minutes.

Eggs-pert Cooking Tips from Sam

#1 – Best Hard Boiled Eggs Ever

I wanted to share my method for hard boiled eggs since i actually steam them and i have never gone back to boiling. I find steamed eggs have a much more tender white, easier to perfect the yolk to your liking, and rarely ever crack. I also find they are much easier to peel.

Directions:
B
ring the water to a boil then place your steamer filled with eggs [or in my case just a metal colander] over the water and cover. set a timer for 12 mins. place a large bowl in the freezer to get good and cold. you will use this bowl for the ice bath. at the 10 mins mark take the bowl out, fill with super cold water and a bunch of ice. at 11 mins, turn the burner off and remove the lid from the steamer. at 12 mins remove the eggs and place in the ice bath.

this timing makes fully cooked eggs with just a small bit of creamy, slightly undercooked yolk in the centre. if you like your yolk completely cooked dry then add another minute or two to the cooking time.

This method will yield consistent results every time.

#2 – Best Scrambled Eggs Ever

Here’s how to get super creamy delicious scrambled eggs without cheese! this is one of my fave ways to cook eggs. it takes a little patience but so well worth the effort.

Directions: crack however many eggs you want into a bowl and stir them gently to combine the yolks and whites. resist the urge to beat them, this only toughens them up and is better for omelettes etc. so mix gently. 

pour eggs into a low heat pan with a bit of your choice of melted fat [butter, ghee, lard etc.]. then stir the eggs in the pan as often as you have the time and patience for. the longer you take to cook these eggs, the lower the heat, and the more you stir them, the creamier they will be. i usually take 15 – 20 mins to cook these eggs while my bacon roasts up in the oven. then take them out of the pan just before they are completely dry. all formed and cooked but still a little “wet” looking.

i swear these eggs will be so creamy you won’t believe it!

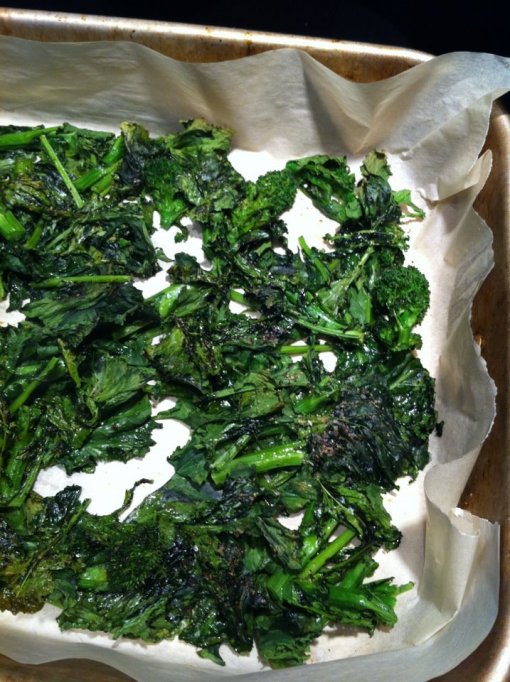
 #3 – Recipe for Awesome Rapini

My all time favorite veggie is rapini. And I cook up a double batch of it every week so I eat it 2 or 3 times. I actually crave its awesome bitterness when I have been less than clean with my diet.  

A typical cooking method is to sautee. But you know me and I like to do things a little different 🙂 I like to oven roast my rapini as I do with pretty much every veggie I cook. 

So this is how I do it.

Directions: Chop off the bottom 2-3 inches of stalk then roughly chop the rest in 2-3 inch pieces. Spread out on a parchment lined baking pan. Drizzle olive oil, kosher salt and pepper then toss to coat. Roast in a hot oven about 425 degrees for 10-15 mins. When you pull it out you’ll see you have several crispy rapini chips from the leaves sitting on top and the rest will be tender roasted yumminess.

Tastes great still at room temp if you’re like me and have to eat lunch in the car sometimes. And I love it for breakfast.

That’s it for this week.  Stay tuned for the riveting conclusion to the GET REAL challenge next week!
Last week we had some awesome recipes from the Quantum CrossFit GET REAL Challenge.  It seems like people are getting more gourmet by the week!  We’ve got some serious winners in this week’s recipe round-up.  Enjoy!

I’m starting with 3 different creations from Jodi….apparently she is gunning for Top Chef Paleo edition and/or to be my personal chef.

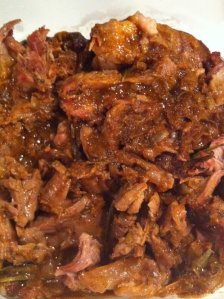
Jodi’s “Melt in your mouth Lamb Shoulder Roast”

Ingredients
2lb lamb shoulder roast (mine was boneless)
Olive oil
Salt and pepper
1 full garlic separated into cloves but not peeled
Rosemary
2 cups beef stock
1 tbsp almond flour
1 tbsp chopped capers
Fresh chopped mint

Directions:
Preheat oven to 500
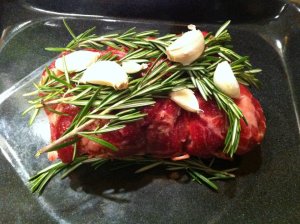
Line the bottom of a roast pan with half the rosemary and held the garlic cloves
Rub the roast with olive oil and season on all sides with salt and pepper.
Place roast in pan and top with remaining garlic and rosemary.
Cover roast with tin foil and place in oven. Immediately turn oven down to 325.
Walk away and come back 3 hours later.
Remove from oven and take roast from pan. Leave to sit on cutting board and cover with foil to let set.
Pour fat from roast pan and add almond flour and stock to pan on stove top. Scrape the bottom of the pan to get all the drippings to be part of the gravy and bring to simmer.
Add capers, and mint (up to you how much to add) and reduce over low heat.
The roast will shred super easily and then serve with gravy over top.

Here is a picture of the Before:

Enjoy!

Jodi’s “Slow cooker baby back ribs”
aka: The way to Summer’s heart.

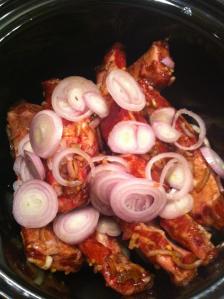
Before Pic.

Ingredients:
– 1.5 lb baby back ribs
– 4 onions (cut in quarters)
– 2 shallots finely chopped
– 2 shallots sliced thinly
– 1 tsp chopped garlic
– 1/4 cup tamari
– 2 tbsp maple syrup
– 1/2 tsp Cinnamon
– 1/2 tsp Allspice
– 1/2 tsp Ginger Black Pepper to taste

Directions:
I started by laying out the onions in the bottom of the slow cooker. In a bowl, mix together the finely chopped shallots, garlic, tamari, maple syrup, cinnamon, allspice, ginger and black pepper. Cut the ribs into individual pieces and place in a zip lock bag. Pour seasoning mix into bag and seal bag and squish bag around to cover the ribs entirely with the sauce. Empty contents of Zip lock bag into slow cooker on top of base of quartered onions. Top with sliced shallots. I cooked this on the low setting of my slow cooker for 7 hours.

Then the real trick…

When finished cooking, I made a reduction out of the juices/sauce from the bottom of the slow cooker by pouring first into a measuring cup and separating off the fat from the top and then pouring into a sauce pan and simmering until delicious (until it was reduced to about 4 tablespoons) and then drizzled the sauce reduction over the ribs.

The result – perfectly fall of the bone delicious ribs.

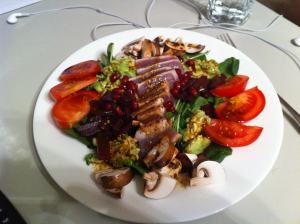
Jodi’s gorgeous “Tuna Salad”

This was one of my favourite salads ever. Seared tuna, guacamole, tomato, mushrooms, spinach and pea shoots topped with a home made tamari, olive oil, cayenne pepper and dijon dressing.

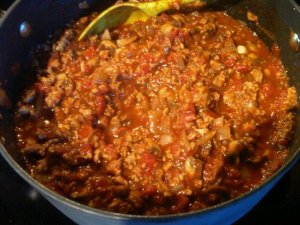
Lisa’s “Chicken masquerading as Chili”

Ingredients
– coconut oil
– 2 large onions. diced
– 3 glove garlic, diced
– 2 lbs ground mennonite chicken
– chili powder, chipotle chili powder, smoked paprika, cumin, oak smoked sea salt, pepper
– 16oz mushrooms, chopped
– 1 small can tomato paste
– 1 28oz can diced canned tomatoes
– cocoa powder

Directions:
Saute onion in coconut oil in large pot over medium heat (I did this til starting to caramelize).
Add garlic and saute a few more min.
Stir in ground chicken and (lots of) seasoning and brown. (You can add the seasoning later but I’ve convinced myself the meat tasted better if I put the seasoning on it while it cooks.)
Add in mushroom and cook til mushrooms are soft.
Reduce heat and mix in tomato paste.
Stir in canned tomatoes.
Once heated, taste and add more seasoning as needed (I had to put a ton in mine!)
Simmer on low heat for an hour to two.
Add about 2 tsp cocoa powder partway thru.

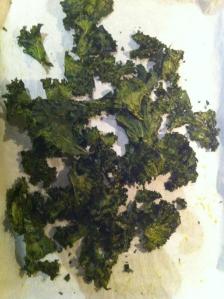
Anthony’s “Kale Chips”

Whose having a party? Because I’ll be bringing the kale chips.

Baked at 150 degrees for 3 hrs. Works well but a bit time consuming. Dressed with sea salt, pepper, lemon, and olive oil.

Amanda’s “Mexican Meatloaf”

There is no picture, but I am sure it will make you do this…. (note: I spent far too long trying to find a pic of Richard Simmons in a Sombrero to capture the spirit of this recipe, so I had to settle with this…)

Happy humpday! I took some gf ground beef and a package of sausage out of the freezer this morning with no real plan. Got home from the gym with no real cooking motivation, and threw this together with what I had on hand: Mexican meatloaf! Turned out pretty darn tasty, and will surely help you PR your deadlift.

The loaf:
Lb ground beef
4 spicy sausages (I used Rowe farms hot Mexican)
one minced onion
2 shredded carrots
½ Cup almond Flour
1 or 2 eggs

Remove sausage casings.  Mix all of the above and put in a loaf pan.  See how it fits just perfect?  Oven at 350 for an hour.

The Way Better Than Ketchup Glaze:

Can of Tomato Paste
Salt, Pepper, Garlic
Tbsp of grainy mustard, olive oil and chili powder
Tsp of ginger
½ tsp of cinnamon
juice of 1 lime

Mix and heat for about 15 min.  I added half to the top of the loaf about half an hour in and saved the rest for the side of my plate for reheats.

Note: Since the sausage I used is pretty spicy and zippy, I didn’t add any other seasonings to the meat mixture.  If you try something like Italian Sausages, maybe add some of your own spicy zip.  Ole!

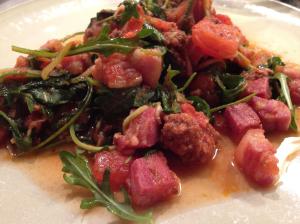
James’ variation on Jason’s Famous Zuc Noodles…

Loved Jason’s idea of zucchini spaghetti and everyone’s variations on it. This version has some diced pancetta, vine tomatoes, arugula as well as some left over ground beef.

Elizabeth’s “Simple Scotch Eggs”

I love eggs but don’t like choking down plain hard-boiled eggs when I need a portable protein snack. These are a super easy adaptation of scotch eggs with no breadcrumbs or other haute mess ingredients.

You need:
6 hard-boiled eggs, peeled
3/4 lb ground pork
salt, pepper
Spice it up: I add about 1 tbsp red pepper flakes, a couple shakes of ground cloves, a couple shakes of garlic powder,1 tbsp of dried onion, 1+tbsp parsley (i use the paste bc I am lazy)

To make:
preheat oven to 375
put your pork and spices in a mixing bowl and mix it up with your (clean) hands. grab a handful, flatten it in your palm, add an egg and wrap it like you are making a snowball.
Bake for about 30-35 minutes or until it gets crispy and brown.

I have jury duty next week and intend to bring these in the hope that being the smelly egg woman will get me excused quickly.

That’s it for this week!  Stay tuned for next week’s recipe round-up!! 

We have just finished the first week of Quantum Crossfit‘s annual GET REAL Food Challenge.  I am so impressed with everyone’s enthusiasm thus far!  I am even more impressed by the fancy schmancy cooking skills that people are busting out…people have been pulling together some pretty epic meals!  As a result, I wanted to share some of the awesome recipes that some of the participants have been whipping up.  Without further ado (in no particular order:)):

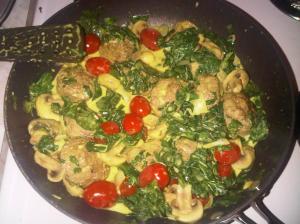
Jason’s “curried meatballs dragged through the garden”

Meatballs:
– 
1lb grass fed ground beef
– 1lb naturally raised pork
– 1/3 med onion
– 1tsp minced fresh ginger
– 
1 clove minced fresh garlic
– 2 eggs
– 2tsp coconut flour
– 
2tsp coconut oil
– handful chopped fresh parsley
– salt, pepper
Directions: As you see fit

, mix all the stuff together, pack the 12 slots on a muffin tin. Toss it in oven at 300 for 15 mins or so and flip over in muffin tin once with a fork.

The Garden:
– 1 can coconut milk
– 
1tsp curry powder
– 2tsp minced fresh ginger
– 2 cloves minced fresh garlic
– 
1 bag fresh spinach
– the rest of the onion
– 1 pint mushrooms halved
– 1 pint grape tomatoes (as is)
– 
handful of chopped fresh cilantro
Directions: Toss the stuff in a stir fry pan with 2 Tbsps of coconut oil, along with onion, ginger, garlic, and mushrooms. Then coconut milk, tomatoes and curry powder. Spinach and cilantro go in when you take meatballs out of oven.

Throw it all together and you’ve got yourself a magical meal.

Ashley’s Murg Kari (slightly modified from a retro Time Life book collection circa 1969…true story)

First, some curry-warrior tips from the master (aka: Ashley):

– Prep it all first, then start cooking.
Turmeric stains like red wine on white carpet at a Twister party. Beware! Plastic utensils, countertops, containers, fingers, you name it. It’s also really good for you.
– Replace the oil using whatever your Paelo-ness level dictates. Use the full 1/2 cup though, as the it remains in the pan to fry the onions etc.
– I left the skin on the chicken (out of forgetfulness vs. savvy adaptation). It still worked, it just sticks to the pan a bit. I also just used thights & legs.  I’m not a breast man.
– Use the individual spices (and fresh coriander a.k.a. cilantro & ginger), it makes a difference. On the other hand, buy the Garam Masala premixed at a store, or just leave it out.  I also used chili flakes instead of hot red pepper.  You can get chopped ginger in a jar, or grab a knob from any supermarket – use the back of a spoon to scrape off the skin.
– I leave out the yoghurt now, and it’s still @#%&ing good.  I served it on Cauli Rice, which I finally tried making in the Magic Bullet. It was @#%&ing magic.
– I always forget the lemon, so you may as well ditch it.
– Use a big skillet with a lid. It’s the only pan you’ll need.
OK here we go.

Murg Kari – Chicken Curry (To serve 4 to 6)
–  2 to 2½ pounds skinned chicken legs and thighs and boned, split chicken breasts
– 1 tsp ground hot red pepper
– ¼ tsp ground fennel, or fennel 
seeds pulverized with a mortar
 n pestle
– 3 tsp salt
–  ½ cup oil (Summer: I’d recommend coconut oil)
– ½ cup water
– 1½ cup finely chopped onions
– 1 cup finely chopped fresh tomatoes or substitute 1 c chopped, drained
–  1 tbsp finely chopped garlic
– 1½ tsp scraped, finely chopped fresh ginger root
– 2 tbsp finely chopped fresh coriander
– 1 tsp ground cumin
– 1 tsp turmeric
– 1 tsp garam masala
– 1 tsp ground coriander
– 1 tbsp fresh lemon juice

1. Pat the chicken pieces dry with paper towels and sprinkle them with 2 teaspoons of the salt. In a heavy 10- to 12-inch skillet, heat the oil over high heat until a drop of water flicked into it splutters instantly. Add the chicken and fry for 3 or 4 minutes, turning the pieces about with a spoon until they are white and somewhat firm. Transfer the chicken to a plate.

2. Add the onions, garlic and ginger to the oil remaining in the skillet and, stirring constantly, fry for 7 or 8 minutes, or until the onions are soft and golden brown. Reduce the heat to low, add the cumin, turmeric, ground coriander, red pepper, fennel and 1 tablespoon of the water, and, stirring constantly, fry for a minute or so. Stir in the tomatoes, 1 tablespoon of the fresh coriander, the yoghurt and the remaining teaspoon of salt.

3. Increase the heat to moderate and add the chicken and any juices that have accumulated in the plate. Pour in the remaining water. Bring to a boil, meanwhile turning the chicken about in the sauce to coat the pieces evenly. Sprinkle the top with the garam masala and the remaining tablespoon of fresh coriander, reduce the heat to low, cover tightly, and simmer for 20 minutes, or until the chicken is tender but not falling apart.

To serve, arrange the chicken attractively* on a heated platter, pour the sauce remaining in the skillet over it, and sprinkle with the lemon juice.

*I love these home-maker directions calling out to us from 1969.

Garam Masala (just in case you’re crazy enough to make it yourself)

2 tablespoons coriander seeds
2 tablespoons cumin seeds
2 tablespoons cardamom seeds
2 tablespoons black peppercorns
1 cinnamon stick, cut into pieces
1 teaspoon whole cloves
1  teaspoon grated nutmeg

In sauté pan, over medium heat, add everything except for the nutmeg. Toast until dark, about 12 minutes, shaking the pan often.  Remove and cool.  Grind the spices in a spice mill or coffee grinder into a powder. Remove and stir in the nutmeg. Yield: about ½ cup..  Source: http://www.Foodnetwork.com

Amanda’s “pot of awesomeness”

no picture, but I’m sure it will make you do this….

I just made a pot of easy seasonal deliciousness (that turned out kinda borscht-ish), so I thought I would share. Food processor required or it is no longer easy!

Ingredients: Shred or thinly slice: leeks, carrots, a sweet potato, shallots (or onions), fennel bulb, beets (I used golden because I’m fancy).

Directions:
Sauté the leek and shallots in a big knob of gf butter or ghee, add other veggies after that magical thing happens when butter and leeks get together over some heat.

Throw in some garlic, a litre of veggie stock (and some water if you need more liquid), and 1 or 2 craploads of dill (bonus points if you have fresh. I used dried) and a can of coconut milk, salt and pepper. And probably more dill.

I like one pot meals, so I mixed and egg with some dill and garlic and s&p and made teeny meatballs that I dropped right in the simmering soup to cook.

It’s pretty boss, you guys.

Lisa’s “Fancy Pork Chops w/ Cauli-Mash Faux-tatoes”

Pork Chops – Ingredients:
– Pork Chops
– Onions
– Garlic
– Lots of mushrooms
– coconut milk
– mustard powder
– Salt and pepper

Directions: Fry some onions, garlic, & LOTS of mushrooms, remove that & brown the chops, throw it all back in and add a cup of coconut milk and mustard powder, S&P, simmer covered for about 10-15min. Serve on cauli-mash.

Garlic Mashed Cauli-tatoes
– 1 head cauliflower
– 2-3 cloves of garlic (your preference)
– grass-fed butter
– nutmeg
– pepper

Throw everything in a steamer until soft (really soft – mine was a little too firm and I ended up with a cross between cauli-mash and cauli-rice), then toss into food processor with a couple nubs of grass fed butter. Some nutmeg and pepper to taste. Process until really smooth.

Jack’s “Tower O Veggies” and other fun stuff

Layer one: Paleo Slaw
1 head cabbage
2 lg carrots
1 cup paleo mayo(homemade)
1/4 grated onion
2 tbsp white vinegar
1 tbsp powdered mustard
1 tsp black pepper
1/2 tsp celery salt

1. Shred cabbage and carrots and onion in food processor.
2. In another bowl combine other ingredients.
3. Slowly add resulting mix to ground veggies.

Layer Two: Gai Lan (chinese broccoli)

Fry chopped Gai Lan in coconut oil with garlic and salt.

Layer Three: Burger!
1 lb ground beef
~1 cup almond meal
1 tbsp Worcestershire Sauce
1 tbsp Dijon Mustard

Mix in bowl, made four patties.

Layer Four: Garnish

Chopped onions fried in coconut oil
Half an avocado, sliced.

I would have added more meat in the form of bacon if I did this meal again.
Original Recipes made paleo from old recipes.

Served with a bison burger and "Bubbies" pickle.

It is rare that I post a Veggie only recipe which is odd because I love to get creative with my veggies.  Whole Foods has a pre-made root veggie cake that looks amazing (and apparently tastes pretty good too based on FPH’s feedback), but contains some questionable ingredients so I’ve never touched them.  I decided to try making my own version.  This one is definitely going into my book of favourites…..I am addicted to these suckers now.  You can use any root veggies, but I like the celery root because it’s not as starchy as some of the other root veggies and it pairs nicely with the carrots and parsley.

*Note: This recipe requires a food processor.  If you do not have one, I am sure you could grate the veggies if you’re up for an arm workout.  Hey, maybe you could sub this in favour of your shake weight routine.

Ingredients:
– 1 large (or 2 small) celery root – outer skin/knobs removed
–  3 large carrots or 12 baby carrots – peeled (if regular carrot)
– 3 parsnips – peeled
– 1/2 Cup parsley – chopped
– 1/2 red onion
– salt and pepper
– 1 Tbsp coconut oil
– 2-3 egg yolks

Directions:

1. Grate all the root veggies and onion in the food processor.
2.  Mix them together with the parsley and salt/pepper in a bowl.
3.  Add the egg yolks…start with 2 and then add a 3rd if needed.  You should be able to mould the mixture into patties and if it is not sticking together, add another egg.
4.  In a large skillet, heat the coconut oil.  Also, heat your oven to 375.
5.  While the pan is heating, make patties with the root veggie mixture.  Squeeze out the excess moisture while you are shaping them.
6.  Fry them in the skillet for about 2 minutes per side, until they are brown.
7.  Transfer them onto a parchment paper lined baking sheet and pop them in the oven for about 10-15 minutes.  This helps to finish cooking the veggie all the way through.
8.  Enjoy!

Fully Primal Husband gave the following testimonial, “These are really good!  They taste better than the Whole Foods patties.”  Nice.

Served with roasted butternut & acorn squash with apples

“She’s got legs….She knows how to use them…”  ZZ Top anyone?  We bought 1/2 of a lamb from my friend’s farm back in August and have had the leg sitting in the freezer for the past few months.  I had never cooked a leg of anything before, so I was hesitant to try it out for fear of messing up the entire chunk of meat.  Then we found a good recipe for Crock Pot lamb shoulder in a local magazine, so we used that as inspiration for this dish.  The meat was so tender and amazing!  It’s the perfect winter dish and I am now officially a leg girl.  Bonus points if you rock out to ZZ Top whilst doing the reduction.

NOTE: You don’t need a crock pot to do this recipe.  You can easily braise it in the oven and I’ve provided some guidelines for this in the instructions.

Ingredients (serves 6-ish)
–  1 bone-in leg of lamb (pastured)
– 1.5 Tbsp of butter or coconut oil
– 6 cloves of garlic – peeled
– 1 onion – sliced
– 1 celeriac (aka: celery root) – peeled and cut into bite size chunks
– 1 leek – sliced
– 1 can of diced tomatoes – 796mL
– 1/2 Litre chicken stock
– 1 Bottle of red wine
– 1/2 cup red wine vinegar
– 4 sprigs of rosemary
– 4 sprigs of oregano
– 2 bay leaves
– salt and pepper

Directions:

  1. Leave the meat out of the fridge and let it come up to room temperature.
  2. Generously salt and pepper the entire leg.
  3. In a large and deep skillet (we used a large cast iron skillet) heat the butter/oil.  Once it starts to smoke, add the lamb and sear it for 3-5 minutes on each side or until you get a nice brown crust.  Make sure you sear it everywhere….this may require you holding the leg with tongs in an awkward position, but you do not want to leave any piece un-seared.  NOTE:  It’ll get smokey, so removing your fire alarm is recommended.
  4. Put the seared leg into the Crock Pot or into a large/deep baking dish
  5. Let the pan cool down for a couple minutes.  Then add the garlic and onions, sautéing for 2 minutes.
  6. Add the celery root and leeks and sauté for another 2 minutes.
  7. Add the red wine and deglaze the pan.  Let the red wine reduce until it is almost like a paste – Simply let it simmer for about 10 minutes or longer.  Stir and scrape the bottom every minute or so.  Don’t get anxious….let it reduce!
  8. While the wine is reducing, add the tomatoes to the Crock Pot on top of the lamb.  Also add the herbs and bay leaves.
  9. Once the wine has reduced, add the red wine vinegar and stock.  Bring it up to a simmer and then pour it into the Crock Pot or baking dish. The liquid should just cover the leg.  If it doesn’t, you may need to add a bit more stock.
  10. CROCK POT: Let it cook on high for 8 hours or low for 12-ish (we used high, so I don’t know the exact time for low).  It is done when the meat is tender.  Not completely falling off the bone, but you should be able to tear it apart pretty easily with forks.
  11. OVEN: Cover the baking dish with foil and braise it in the oven at 300 for about 4-6 hours (I think…you’ll have to check it every hour to get the right time).
  12. Try your best to pick out the rosemary, bay leaves and oregano stems.  Serve with the celery root sauce on top
  13. Enjoy!

Fully Primal Husband provided the following testimonial, “Oh man, this is good.  This might be my new favourite dish.  The flavours are amazing.”

This is my contribution to my Christmas dinners this year….a Cranberry Orange compote to go with the big bird.  I love cranberry sauce, but most cranberry sauce recipes are loaded with refined sugar….and the pre-made cranberry sauces use high fructose corn syrup which is deeees-gusting.  I decided to take the reins and make a much healthier version of cranberry sauce.  This is a modified version of my late Grandmother’s recipe and I think she would be proud.

Note: There is maple syrup in this.  That being said, the amount of sugar is much less than a traditional recipe and you could probably omit it all together if you are OK with a more tart taste.

Ingredients (makes LOTS…you could easily 1/2 this recipe):

– 3 Oranges – very sweet – peeled and cut into 1/2″ chunks
– 1 Cup of fresh squeezed orange juice
– ~7 Litres of cranberries (2 bags of the fresh cranberries)
–  2 cinnamon sticks
– 5 cloves
– 2 tsp of dried ginger – or use 1 tsp of fresh grated
– 1/4 Cup of maple syrup (or more/less to taste)

Directions:

  1. Boil the orange juice,  maple syrup and spices for 5 minutes
  2. Add the orange chunks and simmer over med-low heat for 3-4 minutes….until oranges become soft and begin to break apart
  3. Add the cranberries and cook uncovered for about 7 minutes or until all of the cranberries have popped.
  4. Cool and store in the fridge.  Tastes better as the days go on.
  5. Enjoy with a cooked bird!

Fully Primal Husband provided the following testimonial, “Cran-f*ckin-tastic.”  Enough said.

One thing I sometimes miss is a sweet BBQ sauce….especially when it comes to ribs.  I’ve made ribs before using spice rubs and/or other Paleo/Primal BBQ sauces, but I haven’t found the perfect recipe that gives me that sweetness without using sugar.  UNTIL NOW!!!  This is by far the BEST Rib sauce EVER….And there is zero added sugar in it.  I didn’t make this sauce recipe up myself….a quick google search for “Paleo Slow Cooker Pulled Pork” lead me to this Paleo Eats blog.  We first made a slightly modified version of the pulled pork recipe (which is amazing), but then decided to use the same type of sauce for ribs. The combination of the Orange juice and Chipotle peppers makes this recipe amazing.

Ingredients (serves 2-4)
– 2 racks of ribs
– 2 tablespoons coarse salt
– 1 tablespoon cumin
– 1 tablespoon freshly ground black pepper
– 1 tablespoon dried oregano
– 2 teaspoons ground cinnamon
– 1 teaspoon cayenne pepper, or to taste
– 8 whole cloves garlic, smashed
– 4 chipotle peppers – we used canned
– 1 28 oz can of crushed tomatoes
– 2 cups of FRESH squeezed orange juice
– ~1-2 cups of beef broth

Directions:

  1. ALERT! You need 3-4 hours for the braising, so make sure you’ve got time.  You can do it 1 or 2 days before then pop it in the fridge until you’re ready to grill.
  2. To braise, pre-heat oven to 200. Yes, 200.
  3. Prepare the rub by mixing together all of the spices.  Spread the rub over the ribs to create a light layer.
  4. Put the ribs in a baking/casserole dish.  Pour the tomatoes, chipotle peppers, orange juice and garlic into the baking dish on top of the ribs.  Mix it around to combine the mixture.  You want the ribs to be slightly covered with liquid, so use the beef broth to make sure they are covered.  You’ll have to modify the amount you use based on the size of the baking dish and # of racks of ribs.
  5. Cover tightly with foil and pop in the oven for 3-4 hours.  You want to take it out as soon as the meat starts to feel tender and come away from the bone.
  6. Once it’s finished braising you can grill it right away or let it cool, pop it in the fridge and grill it another day.
  7. Grill the ribs at medium-high heat for ~5 min per side.  Depending on whether you had them in the fridge or not will impact the cooking time.  Ours were in the fridge so it took 5 min per side with the bbq lid down.
  8. While the ribs are BBQ’ing, pour the sauce into a saucepan and let it simmer and reduce.  Apply some extra sauce to the ribs before you serve.
  9. Enjoy!
Fully Primal Husband lost his mind after eating these….“Wow, these are amazing.  These are by far the best ribs that we’ve ever made.  This sauce tastes like actual BBQ sauce.”
Sitting pretty

Once you shove a can of beer up a chicken’s butt you will never go back…I mean, you will never handle a chicken the traditional way or “missionary style” again.  This recipe made the most AMAZING chicken I’ve ever had….it was equivalent to eating a succulent steak or plate of ribs.  It tasted so indulgent, yet it is just plain old chicken.  It also looks really cool, so that makes the whole experience fun.  Fully Primal Husband took the reins and did this entire recipe without me.  He cooked it on the BBQ as that is his domain, so all I needed to do was eat the final creation.  This recipe was so easy and takes no longer than a normal roasted chicken.  You can do it on the BBQ or in the oven.

Warning: I have no idea whether this is entirely gluten-free.  The beer never comes into contact with the chicken….it is the evaporated moisture from the beer that seeps into the chicken so I’m thinking it’s probably OK.  I read a few blogs of people with Celiac saying they were OK after consuming it.  However, if you are a celiac or have a severe gluten sensitivity, then I would proceed with caution or do this with a gluten-free beer.
Ingredients (Recipe inspired by Bob Blumer from The Food Network):
– 1 Whole Chicken – quality is KEY!  We used a Fenwood Farms naturally raised chicken from The Healthy Butcher.  Remove the giblets and rinse with cool water inside and out. Dry with a paper towel.
– ~2 Tbsp of olive oil or avocado oil (or coconut oil, but that might taste a bit weird)
– A generous amount (~3 Tbsp) of any spice mix – My go-to is Emeril’s Essence Spice Mix…BAM
– if your spice mix did not include salt and pepper, add this
– 1 can of Beer – we used Steam Whistle
Directions:
  1. Spark up the BBQ to 350 on either the Right or Left side only (the bird will be cooked on the opposite side on indirect heat).  If you are doing this in the oven, pre-heat to 375.
  2. Pour oil on chicken and then cover it in spice mix.  Rub it thoroughly to make sure every inch is covered.
  3. Open beer can and empty out half – or drink it (if it won’t kill you)!!
  4. Sit the chicken on top of the beer can – grab it by the legs and sit it down over the beer can so that the can goes into the chicken’s rear and up the cavity.  The legs should touch the ground….like a tripod
  5. Transfer to the non-heated side of the BBQ and place it standing up like a tripod on the grate.
  6. Cook for about 1 hour or 1.5 hours….until internal temperature is 160.  Then remove it from the heat and tent it for 10 minutes.
  7. Enjoy!
Fully Primal Husband devoured this chicken….he said, “Oh man….this is a like a Saturday night kind of meal.  This is the best chicken I’ve ever had.  It’s so easy to make too!”  

I made a green curry a few weeks ago using only green curry paste (Thai Kitchen brand) and coconut milk….I found it a bit bland, so decided to kick it up a notch by adding more fresh ingredients.  The combination of the fresh Kaffir lime leaves, lemongrass and spice from the curry make this naturally sweet and spicy….and it’s super easy to make.  Sweet, spicy and easy….just how I like my men;)

Ingredients (serves 2)

– 2 pieces of Cod or another white fish
–  1 Tbsp fresh minced ginger
– 1 stalk of lemongrass – cut into 1 inch chunks
– 3 Kaffir Lime leaves – roughly chopped – I found dried leaves in the ethnic section of my Whole Foods
– 1 Tbsp green curry paste
– 1 can of coconut milk
– Greens!!! Kale, Chard, Collard…whatever.
– 2 tsp of coconut oil (to cook the greens in)

Directions:

  1. In a large skillet, heat coconut milk and curry paste.  Stir around to blend curry paste and coconut milk
  2. Add lemongrass, kaffir lime leaves and ginger.  Bring to a simmer.
  3. Add fish and turn heat to medium.  Cover and let it simmer for about 7 minutes or until the fish is cooked (flakey).
  4. Meanwhile, in a large wok or skillet, heat coconut oil and add your greens. Saute until they are cooked.
  5. Serve the greens and top them with the fish and curry sauce (strain the lemongrass and lime leaves out!).
  6. Enjoy!
Fully Primal Husband, who is usually ho-hum on my fish recipes, gave the following testimonial, “This fish is really good!

I posted this one to my Facebook page a couple weeks ago and people seemed to like it (including a marriage proposal:)), so I’m posting it here.  Excuse the pic as it was taken with my iphone.  This is one of those recipes that I threw together with no thought….I just grabbed a bunch of spices and threw them together.

I completely stole the Taro Chip idea from Chris Kresser from The Healthy Skeptic….he was talking about it when he was on Robb Wolf’s podcast and it peaked my interest.  Coincidentally, they had a big box of Taro Root at my Whole Foods, so I decided to try them out for the first time.  They are a Hawaiian root veggie and that makes me very happy because I massively heart Hawaii.   I realize it’s far from local, but sometimes you need to support the islands too!

Ingredients (serves 2):
Turkey Cutlets

– 2-3 turkey cutlets (or chicken or veal or whatever cutlet)
– 1 Tbsp coconut oil
– 1 Tbsp Cumin
– 1 Tbsp Coriander
– 1.5 tsp Paprika
– 1 tsp ground mustard
– 1 tsp ground garlic
– salt and pepper

Taro Chips (serves 2)
– 2-3 taro roots – peeled and sliced in a Mandolin to thin slices.  Or you can finely slice them yourself
– 1.5 Tbsp of coconut oil
– sea salt

Directions for Turkey Cutlets:

  1. Mix together spices and rub liberally onto both sides of turkey cutlets.
  2. Heat a non-stick skillet with the coconut oil.  Once the pan is at a medium-high heat, add each cutlet.
  3. Cook for 2-3 min.  Flip and cook the other side for 2-3 minutes.
  4. I served mine on a bed of arugula with some cherry tomatoes and an olive oil/balsamic dressing

Directions for Taro Chips:

  1. Pre-heat oven to 350
  2. Melt coconut oil.
  3. On a baking sheet lined with foil, spread out sliced taro – pour coconut oil over top and sprinkle with salt.  Mix around thoroughly to ensure both sides of each taro piece is coated.
  4. Bake for 20-30 minutes or until they start to brown.
  5. Enjoy

Fully Primal Husband gave the following testimonial, “The turkey is good….it’s nice to have something light.  But I LOVE the Taro Chips.  Oh my god, those are good. They taste just like potato chips!” Agreed.  These are easily a new favourite of mine and when I go to Kauai in August I am going to find some local Taro and go nuts.

Next Page »